We had been looking for bedside lights for a long time, I would find something, stare at it for a while and then decide it wasnt quite right. I love our white bedroom but the thing I love about white is all the warming up you can do with fittings and furniture. I needed the warmth of wood.
I found a light I loved from Citta design, it really is so gorgeous....the wood and copper one?! But they weren't coming in until August and this "build your own home from scratch' project is hogging all my patience. So it was back to the drawing board, I youtubed lots of wood DIY's, mainly Canadian men with very Canadian accents, checkered shirts and serious wood working skills. I could do the checkered shirts, I would even give the accent a go but the skills....nope. I just needed the turning part done for me and then I could totally take it from there. I needed to come up with a DIY, a shortcut to perfect Canadian wood working. I think that's how my brain got me started, I was looking at this sweet wooden bowl, gifted to us from an Aunt and Uncle from....you guessed it, Canada. A wooden bowl, wood that has been perfectly carved and turned...ummmm. And then a trip to Briscoes sealed it....and then their 60% off all ECOLOGY wooden bowls made me fist pump in delight.... It was SO on.
I wanna be all cool and a bit "oh yeh, they worked out alright" about them, except I just think these lights are freaking awesome and I'm so stoked with them!!! So instead I'm doing that 'I have something on my shoulder, I'm gonna brush it off' dance in the most gangsta style I can muster.
So here we go, here's how we did it (I have left out most of the trial and error parts that lead us to the final result, I have also left out the exact amount of pilsner consumed and the Husband and Wife DIY 'just do it my way' battles, you're welcome)
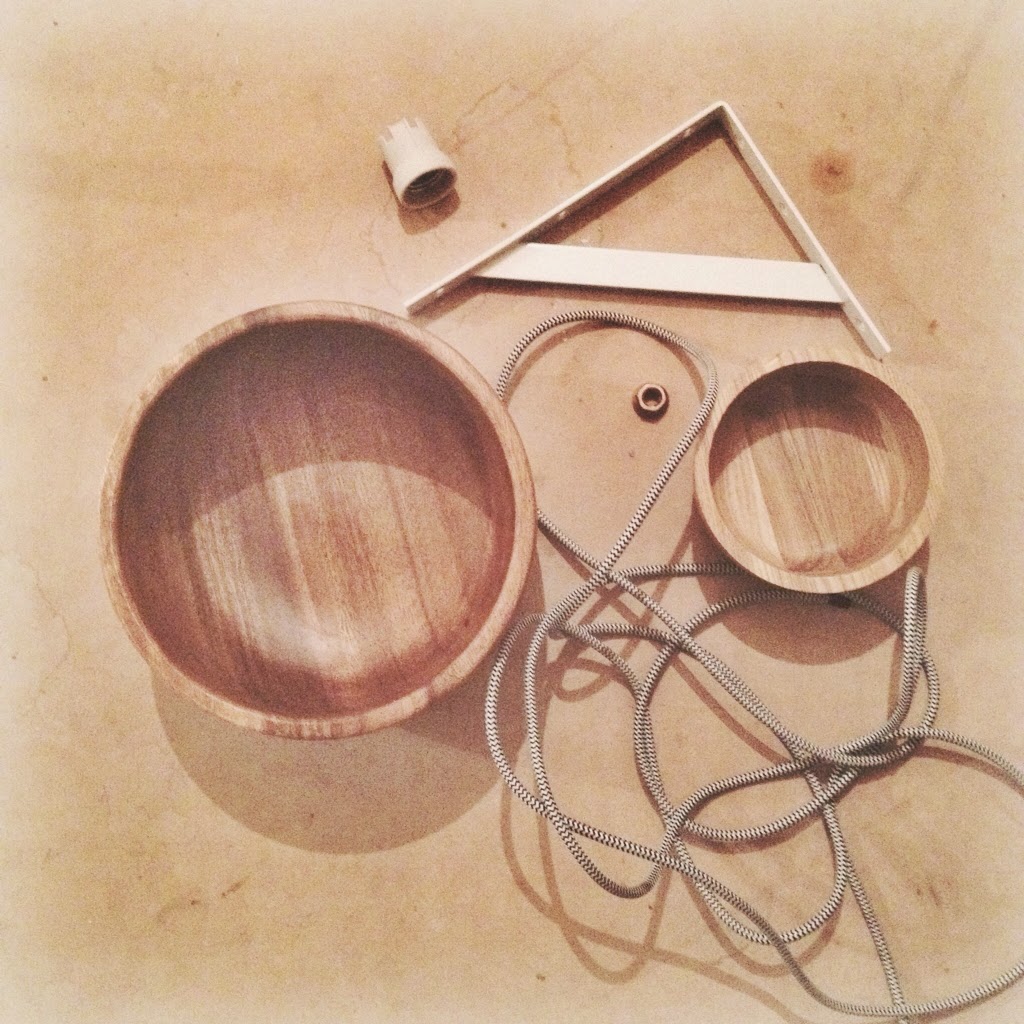
1 x 25cm ECOLOGY bowl These are 60% off at the moment. go, go, go!
1 x 15cm Freedom serving bowl ECOLOGY also do a similar size bowl which is $10 cheaper but I think the colour difference and the fact you can see the layering in the Freedom bowl are little details that make the light.
Coloured cord (whatever length amount you require)
ceramic light socket - sorry, no link for these but any electrical store will have them. You need to use one of these and not a cheapy plastic one as you will screw this directly onto the bowl. They're only a few dollars I think?
We bought our wall brackets from Bunnings in a 2 pack for $10
Brass nut on top from Bunnings too, purely decoration.
Some screws and a drill
Ruler
Pencil
Strong adhesive
Enamel paint (our colour is resene alabaster)
Right, I would start by painting the inside of your big bowl with 2 coats of enamel. I did this at the end, which was not as ideal.
Once that's dry....
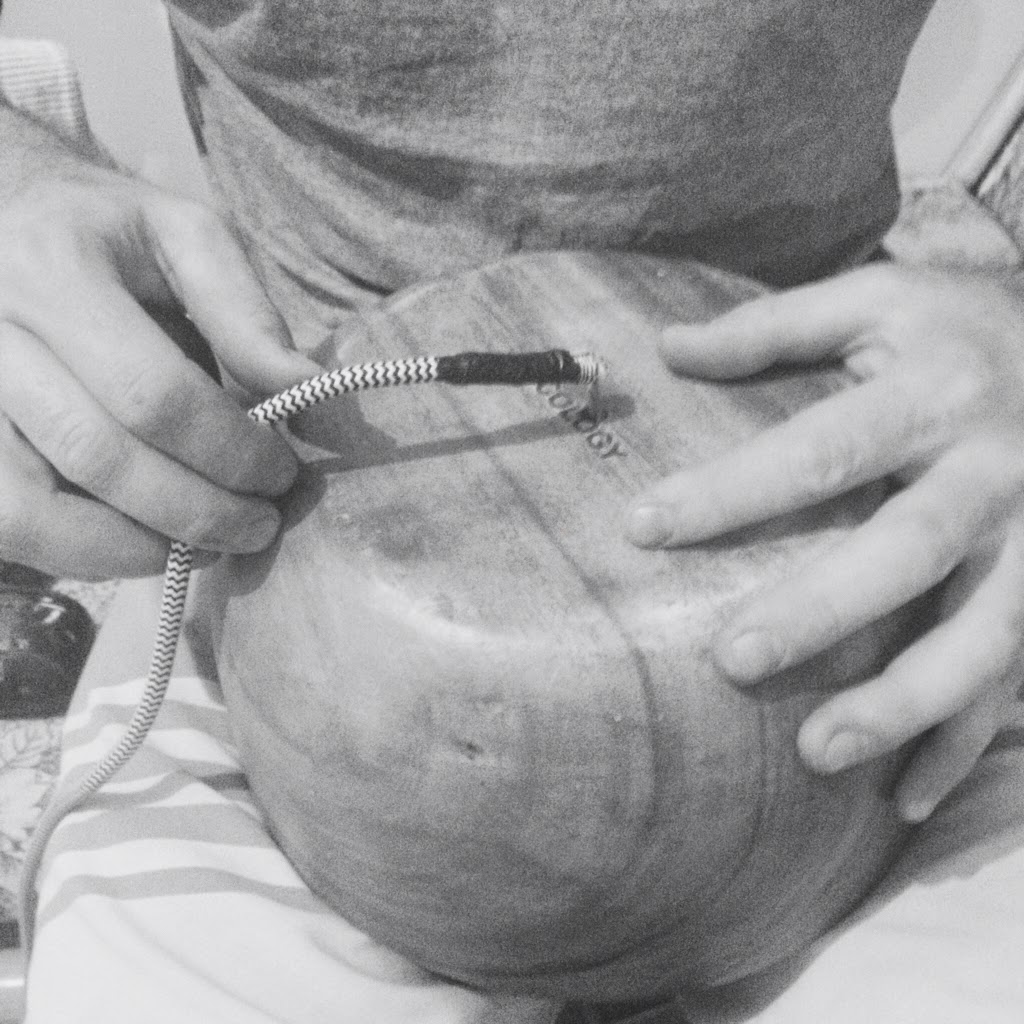
Find the centre of your bowls base, mark them and drill a hole large enough for the light cord to pass through easily
Attach your ceramic light socket to the cord. We did this ourselves but I'm not suggesting everyone does and I am not going to run you through how to be an electrician because neither of us are one of those, in fact when deciding which colour would be the positive/negative between the blue and the brown we decided 'poo is brown and poo is a bit of a negative so brown is negative' say no more, you are not taking advice from us when it comes to wiring.
Thread your cable through your drilled hole and then screw the light socket up onto the bowl.
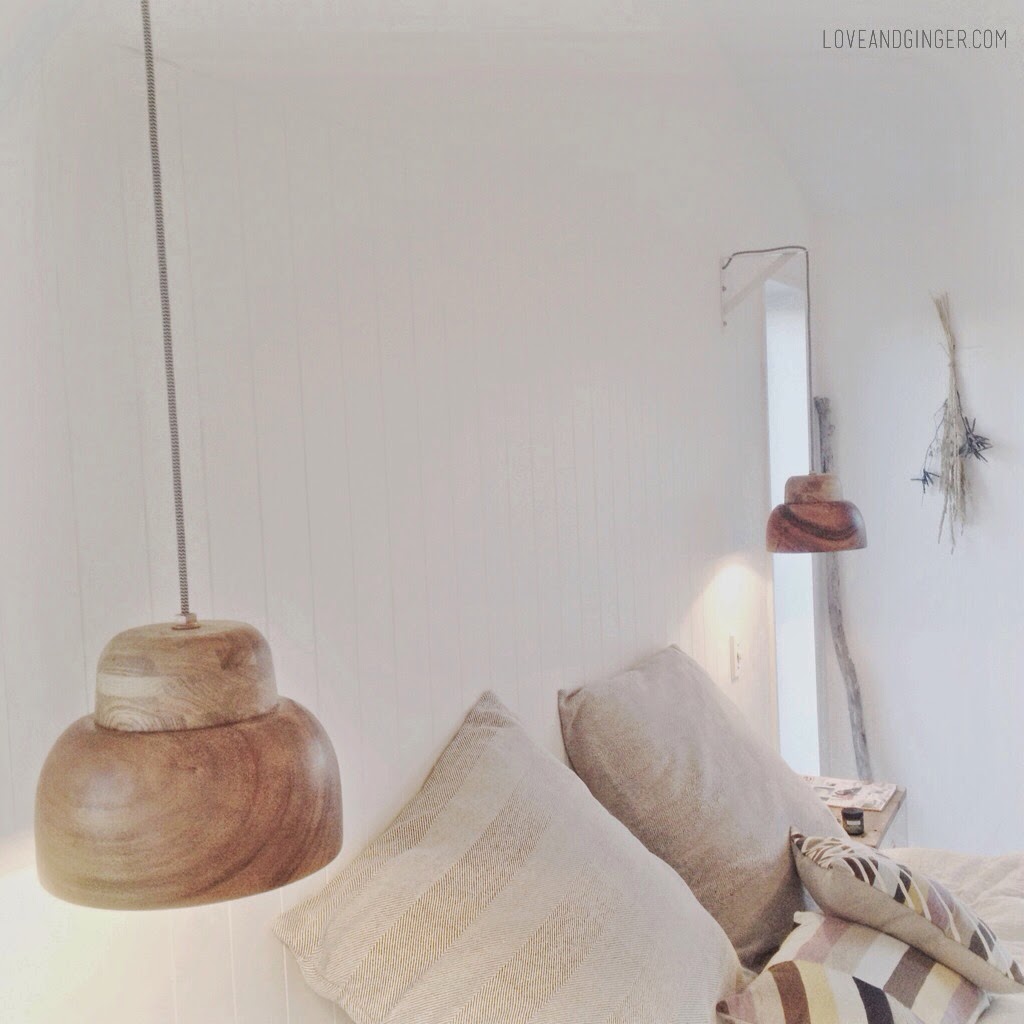
Now tie a knot about 8cm up from where the cable is coming out of the big bowl, then continue to thread it through the small bowl. when you hold onto the top of the cord and hang your pendant, your small bowl should be resting on the knot with a 1-2cm gap between the two bowls. This is to take the pressure off the wiring when hanging.
Spread your super strong glue around the top rim of your small bowl and then press firmly down, wipe away any glue that squishes out and let this cure overnight, we originally thought to screw this down but with the curve of the bowl its hard not to split it, so the glue seemed the better option.
Thread your decorative brass nut (if you so desire) over the cable so it sits on top of the small bowl
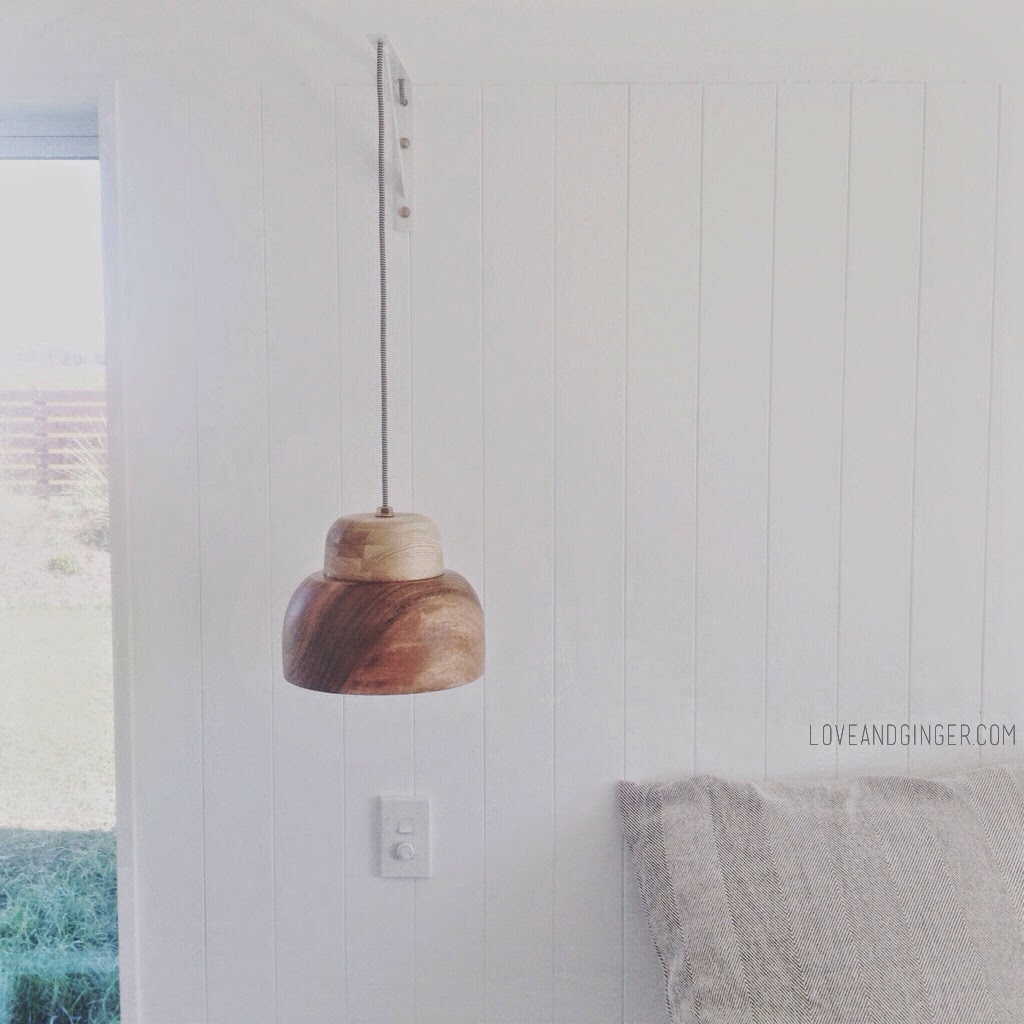
Either attach a plug or connect to your wiring and you are all done!
Look what you did you clever thing, you made a cool light, brush your shoulders, you are a light gangsta now.
I hope this very casual 'how to' is clear enough, feel free to ask me anything if it doesn't make sense.
If you do give this a go, I would love to see your finished result, if you instagram it, go ahead and tag me.
Good luck, have fun and may the sprirt skills of a checkerd shirt Canadian be with you.